Cornflake Marshmallow Cookies – Momofuku Milk Bar Copycat
Momofuku Milk Bar’s Cornflake Chip Marshmallow Cookies are, quite simply, iconic. If you’ve ever had the pleasure of biting into one of these legendary treats, you know exactly what I’m talking about. They’re a delightful paradox – crunchy yet chewy, salty yet sweet, and utterly unforgettable. It’s no wonder these cookies have garnered such a cult following. People are drawn to their unexpected yet harmonious flavor profile, a testament to Christina Tosi’s innovative genius. What makes the Cornflake Chip Marshmallow Cookies so special is their ability to evoke pure joy with every bite. It’s that satisfying crunch of the cereal, the gooey pockets of marshmallow, and the rich, buttery cookie dough all coming together in a symphony of textures and tastes. I’ve been trying to recreate that magic at home for ages, and I’m thrilled to finally share my perfected recipe with you!
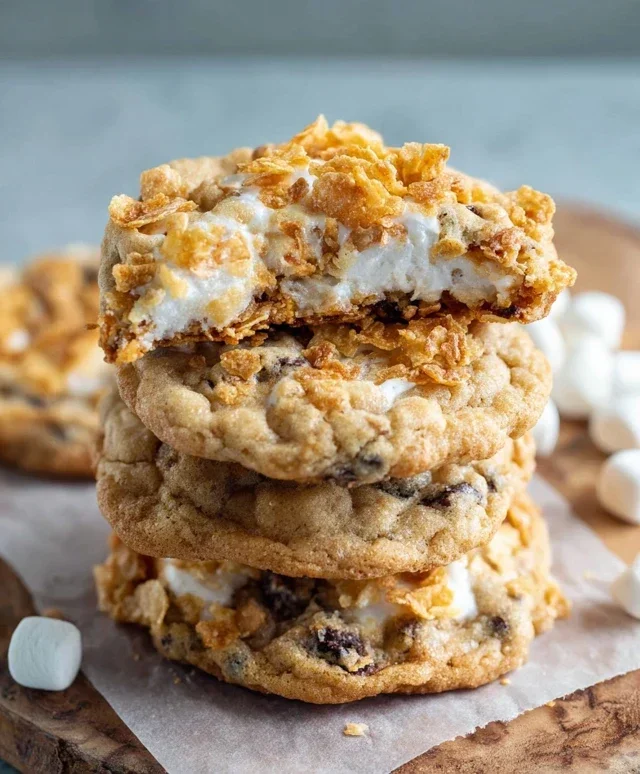
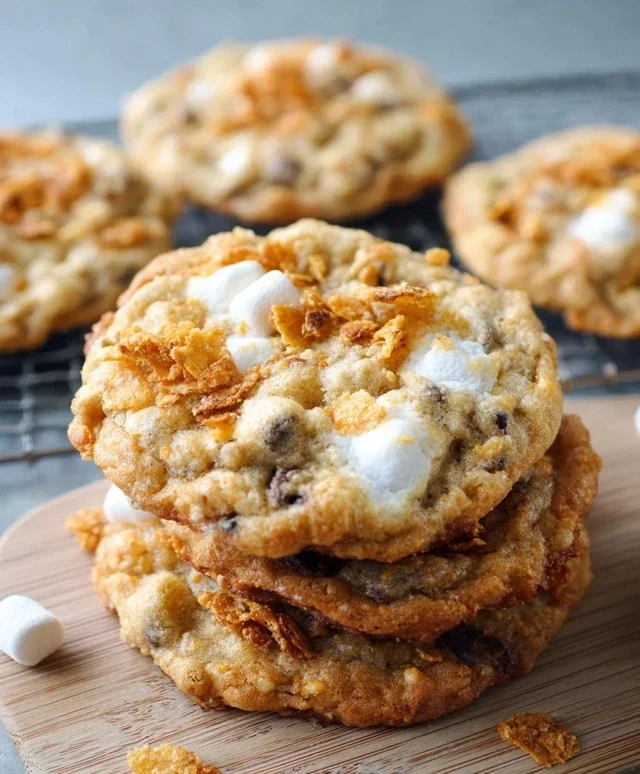
Momofuku Milk Bar Cornflake Chip Marshmallow Cookies
These cookies are legendary for a reason. They’re a delightful explosion of sweet, salty, crunchy, and chewy, all wrapped up in one irresistible package. Inspired by Christina Tosi’s iconic creation at Momofuku Milk Bar, these cookies take familiar flavors and elevate them into something truly special. The secret lies in the “Cornflake Crunch,” a crispy, caramelized element that provides an incredible texture and depth of flavor. Don’t be intimidated by the multiple components; each step is straightforward, and the result is absolutely worth it. Let’s dive in and create some cookie magic!
Ingredients:
For the Cornflake Crunch:
Instructions:
Step 1: Prepare the Cornflake Crunch
First things first, let’s make that magical Cornflake Crunch. This is what gives these cookies their signature texture and incredible flavor. In a large bowl, gently crush the 5 cups of Cornflakes. You don’t want a fine powder, but rather a mix of smaller pieces and some larger, recognizable flakes. Think of it as giving them a good crum extractble. Add the 1/2 cup of malted milk powder and 3 tablespoons of granulated sugar to the crushed Cornflakes. Whisk everything together until it’s well combined. This mixture is now ready to be incorporated into our cookie dough later. Set this aside.
Step 2: Cream the Butter and Sugars
Now, let’s get started on the cookie dough itself. In a large mixing bowl, or the bowl of your stand mixer fitted with the paddle attachment, cream together the 1 cup (2 sticks) of room-temperature unsalted butter with the 1 1/4 cups of granulated sugar and the 2/3 cup of packed light brown sugar. Beat on medium-high speed until the mixture is light, fluffy, and pnon-alcoholic ale yellow, which should take about 3-5 minutes. This process, called creaming, incorporates air into the butter and sugar, which is crucial for a tender cookie. Scrape down the sides of the bowl periodically to ensure everything is evenly incorporated.
Step 3: Add Wet Ingredients and Dry Ingredients
Once your butter and sugar mixture is perfectly creamed, it’s time to add the wet ingredients. Beat in the 1 large egg and the 1/2 teaspoon of vanilla extract until just combined. Don’t overmix at this stage. In a separate medium bowl, whisk together the 1 1/2 cups of all-purpose flour, 1/2 teaspoon of baking powder, 1/2 teaspoon of baking soda, and 1 1/2 teaspoons of salt. This ensures that the leavening agents and salt are evenly distributed throughout the flour, which leads to consistent cookie rise and flavor. Gradually add the dry ingredients to the wet ingredients, mixing on low speed until just combined. Again, be careful not to overmix; overmixing can develop the gluten in the flour, resulting in tough cookies.
Step 4: Incorporate the Star Components
Now for the fun part – adding the stars of the show! Gently fold in the 3 cups of your prepared Cornflake Crunch, the 2/3 cup of mini chocolate chips, and the 1 1/4 cups of mini marshmallows. Use a spatula or your hands to carefully mix these ingredients into the dough. You want to distribute them evenly without crushing the marshmallows or Cornflakes too much. The dough will be quite thick and chunky, and that’s exactly what we’re looking for. The goal is to have pockets of these delicious inclusions throughout the cookie.
Step 5: Portion, Chill, and Bake
This dough is quite soft, so chilling is essential. Cover the bowl with plastic wrap and refrigerate for at least 2 hours, or preferably overnight. This allows the flavors to meld and makes the dough easier to handle. When you’re ready to bake, preheat your oven to 350°F (175°C) and line baking sheets with parchment paper. Scoop heaping tablespoons of the chilled dough onto the prepared baking sheets, leaving about 2 inches between cookies as they will spread. For a truly impressive cookie, you can even gently press a few extra Cornflakes and marshmallows onto the tops of the dough balls before baking. Bake for 10-12 minutes, or until the edges are golden brown and the centers are still slightly soft. Do not overbake; they will continue to set as they cool. Let the cookies cool on the baking sheets for a few minutes before transferring them to a wire rack to cool completely. The combination of textures and flavors in these cookies is simply out of this world! Enjoy every bite!
Conclusion:
There you have it – the ultimate guide to recreating Momofuku Milk Bar’s iconic Cornflake Chip Marshmallow Cookies in your own kitchen! These cookies are more than just a treat; they’re an experience. The delightful crunch of the cornflake-infused dough, the chewy pockets of melted marshmallow, and the salty-sweet punch of the chocolate chips create a symphony of textures and flavors that is truly unforgettable. I’ve found these cookies to be incredibly versatile; they’re perfect for a celebratory dessert, a delightful afternoon pick-me-up, or even a thoughtful homemade gift. Imagin extracte them served warm with a cold glass of milk, or perhaps crum extractbled over a scoop of vanilla ice cream for an extra decadent dessert. If you’re feeling adventurous, consider adding a sprinkle of sea salt on top before baking for an enhanced salty contrast, or even mixing in some chopped pretzels for an extra layer of crunch and savory goodness. Don’t be intimidated by the seemingly complex ingredients; the process is straightforward and incredibly rewarding. I highly encourage you to give these Cornflake Chip Marshmallow Cookies a try – I promise you won’t be disappointed!
Frequently Asked Questions:
Can I make these cookies ahead of time?
Absolutely! The dough can be made and chilled for up to 3 days, allowing the flavors to meld beautifully. You can also bake the cookies and store them in an airtight container at room temperature for up to 4-5 days. They are often even better on the second day as the flavors continue to develop.
What can I do if I don’t have cornflake crum extractbs?
While cornflake crum extractbs are essential for the signature texture, you can create your own by lightly crushing plain cornflakes in a food processor or a zip-top bag with a rolling pin until they resemble coarse crum extractbs. Ensure they are plain cornflakes without any added sugar or flavorings for the best result in these Cornflake Chip Marshmallow Cookies.
Can I substitute the marshmallows?
You can, but it will change the texture. For the best gooey, melty pockets, mini marshmallows are ideal. Larger marshmallows might not melt as evenly. If you prefer a less sticky cookie, you could reduce the marshmallow quantity or omit them entirely, though you would lose a key element of the classic recipe.
Momofuku Milk Bar Cornflake Chip Marshmallow Cookies
A uniquely textured and flavored cookie with the crunch of cornflakes, the chewiness of marshmallows, and the sweetness of chocolate chips.
Ingredients
-
1 cup unsalted butter, room temperature
-
1 1/4 cups granulated sugar
-
2/3 cup light brown sugar, packed
-
1 large egg
-
1/2 tsp vanilla extract
-
1 1/2 cups all-purpose flour
-
1/2 tsp baking powder
-
1/2 tsp baking soda
-
1 1/2 tsp salt
-
3 cups Cornflake Crunch
-
2/3 cup mini chocolate chips
-
1 1/4 cups mini marshmallows
-
5 cups Cornflakes
-
1/2 cup malted milk powder
-
3 Tbsp granulated sugar
Instructions
-
Step 1
For the Cornflake Crunch: Combine 5 cups Cornflakes, 1/2 cup malted milk powder, and 3 Tbsp granulated sugar. Bake at 300°F (150°C) for 10 minutes, stirring halfway. Let cool completely. -
Step 2
Cream together 1 cup unsalted butter, 1 1/4 cups granulated sugar, and 2/3 cup light brown sugar until light and fluffy. -
Step 3
Beat in 1 large egg and 1/2 tsp vanilla extract until combined. -
Step 4
In a separate bowl, whisk together 1 1/2 cups all-purpose flour, 1/2 tsp baking powder, 1/2 tsp baking soda, and 1 1/2 tsp salt. -
Step 5
Gradually add the dry ingredients to the wet ingredients, mixing until just combined. -
Step 6
Fold in 3 cups Cornflake Crunch, 2/3 cup mini chocolate chips, and 1 1/4 cups mini marshmallows. -
Step 7
Scoop dough into balls and place on a baking sheet lined with parchment paper. -
Step 8
Bake at 350°F (175°C) for 10-12 minutes, or until edges are golden brown and centers are still slightly soft. -
Step 9
Let cool on the baking sheet for a few minutes before transferring to a wire rack to cool completely.
Important Information
Nutrition Facts (Per Serving)
It is important to consider this information as approximate and not to use it as definitive health advice.
Allergy Information
Please check ingredients for potential allergens and consult a health professional if in doubt.