Easy Buster Bar Ice Cream Dessert Recipe
Buster Bar Ice Cream Dessert is more than just a treat; it’s a nostalgic journey back to childhood summers and carefree days. If you’ve ever craved that perfectly balanced combination of creamy ice cream, rich chocolate, and a satisfying crunch, then you’re in for a serious delight. This iconic frozen concoction has captured hearts for decades, and it’s easy to see why. It’s the ultimate indulgence, a symphony of textures and flavors that hits every single right note. What truly makes this Buster Bar Ice Cream Dessert so special is its deceptively simple yet utterly brilliant construction. It’s a masterpiece of frozen dessert engin extracteering, delivering pure joy with every bite. Get ready to recreate this beloved classic in your own kitchen – it’s surprisingly achievable and incredibly rewarding!
The Ultimate Buster Bar Ice Cream Dessert Recipe
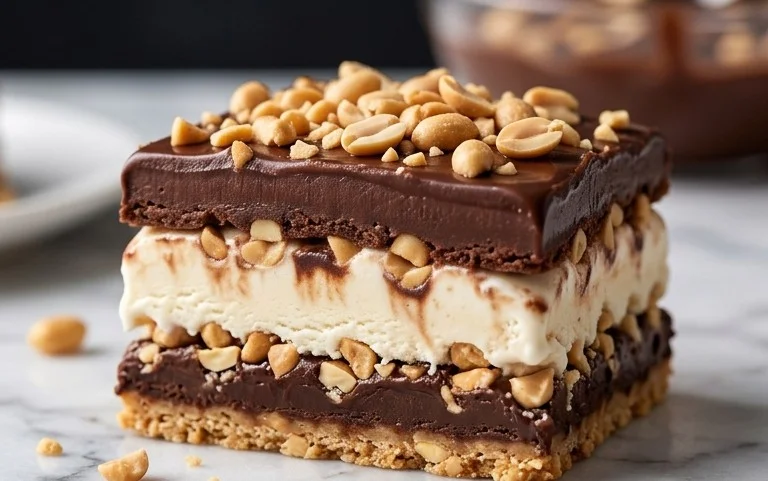
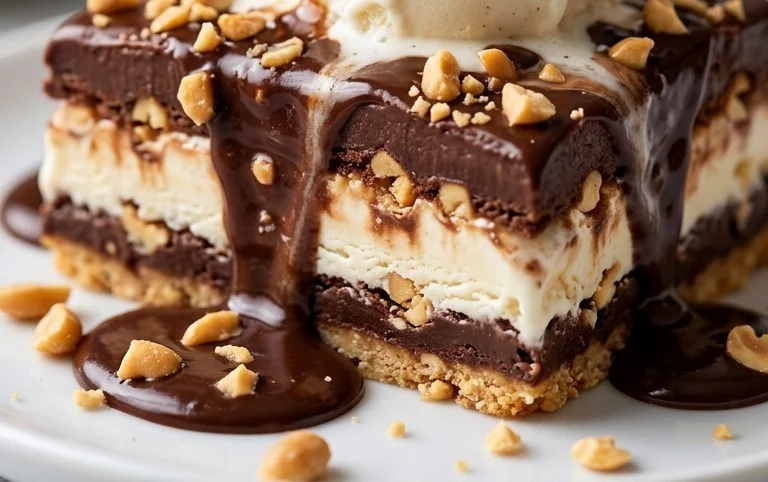
Are you ready for a dessert that will transport you back to childhood memories of pure joy? Today, we’re diving into the decadent world of the Buster Bar Ice Cream Dessert. This isn’t just any ice cream treat; it’s a layered masterpiece of crunchy cookies, creamy ice cream, rich chocolate, and salty peanuts, all coming together to create an unforgettable experience. Perfect for potlucks, birthday parties, or simply treating yourself after a long week, this dessert is surprisingly easy to make and guaranteed to be a crowd-pleaser. Let’s get started on creating this iconic frozen delight!
Ingredients:
Crafting the Oreo Crust
The foundation of our Buster Bar is a delicious, crunchy crust made from crushed Oreo cookies. This step is where the magic begin extracts, setting the stage for all the layers to come.
1. First, let’s prepare our Oreo crust. Take your entire package of Oreo cookies and place them in a food processor. Pulse them until they are finely crushed into crum extractbs. If you don’t have a food processor, don’t worry! You can achieve this by placing the cookies in a sturdy zip-top bag and crushing them with a rolling pin or the bottom of a heavy pan. The goal is to have a crum extractbly texture, with no large chunks remaining. In a separate bowl, melt the 1/2 cup of butter. Pour the melted butter over the crushed Oreo crum extractbs and mix thoroughly until all the crum extractbs are evenly moistened. This will help the crust hold together. Press this mixture firmly and evenly into the bottom of a 9×13 inch baking dish. Make sure to get it right to the edges. You can use the back of a spoon or a flat-bottomed glass to help create a compact and even layer. This crust will provide a delightful chocolatey base for our ice cream dessert.
Building the Creamy Layers
Now that our crust is ready, it’s time to add the star of the show: the ice cream and peanut layer.
2. Next, we’ll work on the ice cream layer. Take your 1/2 gallon of vanilla ice cream and let it soften at room temperature for about 15-20 minutes. You want it to be soft enough to spread easily but not so melted that it becomes soupy. Once softened, spread this creamy vanilla ice cream evenly over the prepared Oreo crust. Gently use a spatula or the back of a spoon to create a smooth, level surface. Now, it’s time for the peanuts! Spread the entire pound of Spanish peanuts evenly over the softened ice cream. Make sure they are distributed as much as possible, so you get that satisfying nutty crunch in every bite. This combination of creamy vanilla and salty peanuts is a classic for a reason! Once the ice cream and peanuts are in place, return the dish to the freezer to firm up. We want this layer to be quite solid before we move on to the chocolate topping, so let it freeze for at least 2-3 hours.
Whipping up the Luscious Chocolate Topping
The pièce de résistance of our Buster Bar is the rich, gooey chocolate topping. This homemade fudge sauce is simply divine.
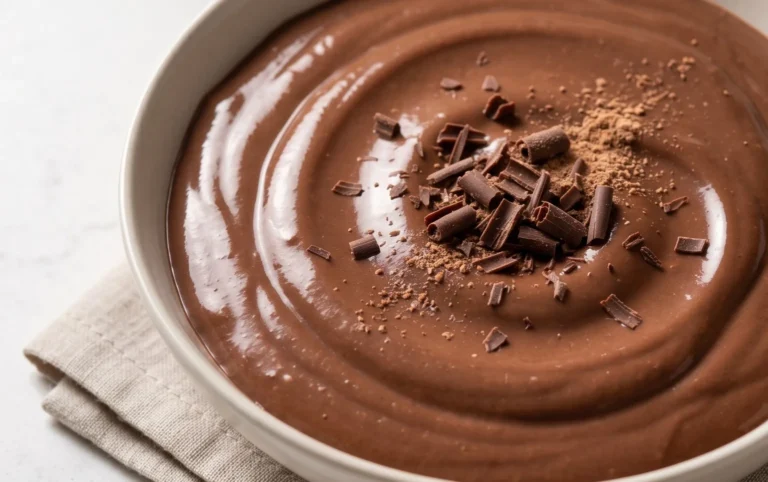
3. While the ice cream is firming up, let’s prepare our decadent chocolate topping. In a medium saucepan, combine the 12 ounces of semi-sweet chocolate chips, 1/2 cup of butter, and the 12 ounces of evaporated milk. Place the saucepan over medium-low heat. Stir the mixture constantly. You don’t want the chocolate to scorch, so keep that heat low and your stirring consistent. Continue stirring until the chocolate chips and butter have completely melted, and the mixture is smooth and glossy. This process can take about 5-10 minutes. Once everything is melted and combined, remove the saucepan from the heat.
Adding the Finishing Touches
The final steps bring all the delicious elements together for a truly spectacular dessert.
4. Now, it’s time to assemble the final layer. Once your ice cream and peanut layer has been in the freezer for at least 2-3 hours and is firm to the touch, retrieve it from the freezer. Carefully pour the warm (but not piping hot) chocolate topping evenly over the frozen ice cream and peanut layer. Use a spatula to spread the chocolate to the edges of the pan, ensuring a complete and even coating. This will create that signature chocolate shell that makes Buster Bars so irresistible.
The Final Freeze and Serving
Patience is key to achieving the perfect Buster Bar experience.
5. After applying the chocolate topping, it’s crucial to let the entire dessert freeze completely. Return the 9×13 inch dish to the freezer and let it freeze for a minimum of 4-6 hours, or ideally, overnight. This allows the chocolate topping to harden and the entire dessert to set firmly, giving you those classic Buster Bar slices. When you’re ready to serve, allow the Buster Bar to sit at room temperature for about 10-15 minutes before slicing. This will make it easier to cut and prevent the chocolate from cracking too much. Cut into generous squares or bars, and prepare for an explosion of flavor and texture. Enjoy your homemade Buster Bar Ice Cream Dessert – it’s truly a taste of pure bliss!
Conclusion:
There you have it! A fantastic recipe for the ultimate Buster Bar Ice Cream Dessert. This creation is truly a showstopper, combining the creamy, decadent richness of ice cream with the irresistible crunch of a chocolatey, nutty coating. It’s surprisingly simple to assemble, making it perfect for both seasoned bakers and kitchen novices looking for a crowd-pleasing treat. Whether you’re hosting a summer barbecue, celebrating a special occasion, or simply craving something sweet and nostalgic, this Buster Bar Ice Cream Dessert is sure to hit the spot. I highly encourage you to give this recipe a try; you won’t be disappointed!
For serving, I love to present these individual delights on a chilled platter, allowing guests to grab their own decadent portion. They are also wonderful served slightly softened, for an even more luscious bite. Don’t be afraid to get creative with variations! You can experiment with different ice cream flavors, swirl in caramel or hot fudge, or even try different nuts like almonds or pecans for the outer coating. The possibilities are endless, and each variation will offer a unique and delightful experience of this classic Buster Bar Ice Cream Dessert.
Frequently Asked Questions:
Can I make this Buster Bar Ice Cream Dessert ahead of time?
Absolutely! This dessert is perfect for making in advance. Once assembled and frozen solid, you can wrap them tightly in plastic wrap and then foil to prevent freezer burn. They’ll stay delicious for up to two weeks, making them ideal for parties or when you need a sweet treat on hand.
What if I don’t have access to a specific type of nut for the coating?
No problem at all! You can easily substitute. Peanuts are traditional, but chopped almonds, pecans, or even a mix of your favorite nuts will work beautifully. If you have a nut allergy, you could try toasted shredded coconut or even crispy rice cereal for a different kind of crunch.
How do I get the perfect, even coating on the ice cream bars?
The key is to work quickly! Make sure your ice cream is firm but not rock solid. Dip the ice cream bar into the melted chocolate mixture, ensuring it’s fully coated. For an extra thick coating, you can dip it twice. Place the coated bars on a parchment-lined baking sheet and return them to the freezer immediately to set.
Buster Bar Ice Cream Dessert
A no-bake ice cream dessert featuring a cookie crust, creamy ice cream, peanuts, and a chocolate coating.
Ingredients
-
1 14.3 oz pkg. of Oreo cookies, crushed
-
1/2 C butter, melted
-
1/2 gal. vanilla ice cream, softened
-
1 lb. Spanish peanuts
-
2 C powdered confectioner’s sugar
-
12 oz semi sweet chocolate chips
-
1/2 C butter
-
12 oz evaporated milk
Instructions
-
Step 1
Press the Oreo cookie and butter mixture into the bottom of a 9×13 inch pan. -
Step 2
Spread the softened vanilla ice cream evenly over the cookie crust. -
Step 3
Sprinkle the Spanish peanuts over the ice cream layer. -
Step 4
In a saucepan, melt the 12 oz semi sweet chocolate chips and 1/2 C butter over low heat. Stir in the 12 oz evaporated milk until smooth. Gradually whisk in the 2 C powdered confectioner’s sugar until fully incorporated and smooth. -
Step 5
Pour the warm chocolate mixture over the peanut layer, spreading it evenly to cover. -
Step 6
Freeze for at least 4 hours, or until firm. Cut into squares before serving.
Important Information
Nutrition Facts (Per Serving)
It is important to consider this information as approximate and not to use it as definitive health advice.
Allergy Information
Please check ingredients for potential allergens and consult a health professional if in doubt.