Cardamom Fig Thumbprint Cookies-Sweet Festive Treat
Cardamom Fig Thumbprint Cookies are more than just a treat; they’re a whisper of cozy afternoons and shared smiles. There’s a certain magic that happens when the warmth of freshly baked cookies fills your kitchen, and these little gems are guaranteed to deliver that embrace. People absolutely adore thumbprint cookies for their irresistible charm – that perfectly indented center beggin extractg to be filled with something delicious. What truly elevates our Cardamom Fig Thumbprint Cookies is the exquisite pairing of two stars: the aromatic, slightly spicy warmth of cardamom, and the rich, jammy sweetness of ripe figs. It’s a sophisticated yet utterly comforting combination that dances on your palate, making them perfect for sipping with tea or coffee, or simply enjoying as a moment of pure indulgence. Prepare to fall in love with the subtle yet captivating flavor of these delightful Cardamom Fig Thumbprint Cookies.
Cardamom Fig Thumbprint Cookies
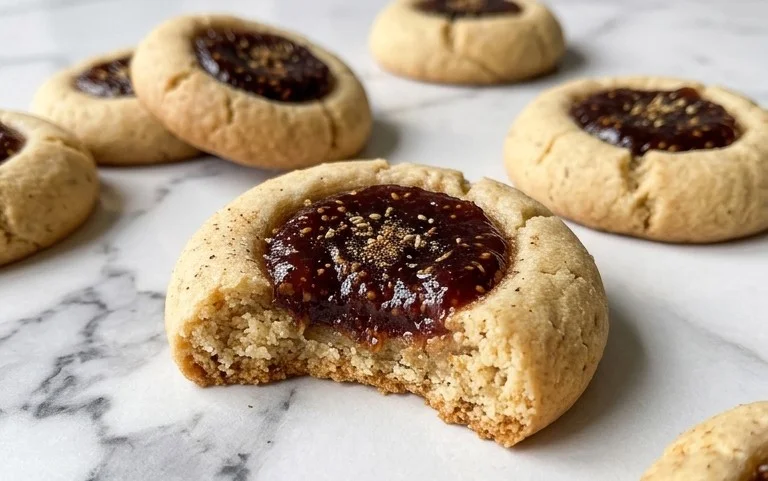
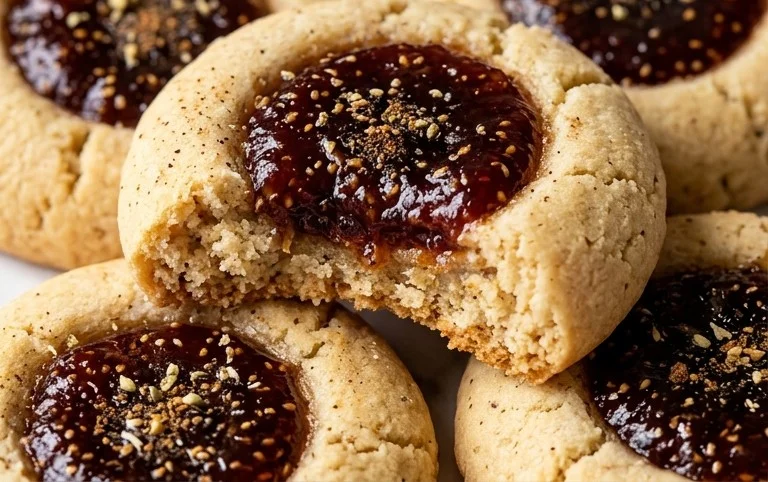
These Cardamom Fig Thumbprint Cookies are a delightful twist on a classic. The warm, aromatic notes of cardamom beautifully complement the sweet, slightly tart fig jam, creating a cookie that’s both comforting and sophisticated. They’re perfect for afternoon tea, holiday gatherings, or simply as a special treat to brighten your day. The texture is wonderfully tender with a delightful little well holding a burst of fruity goodness. Plus, they’re surprisingly easy to make, even for novice bakers!
Ingredients:
Making the Cookie Dough
The foundation of these cookies is a simple, buttery dough infused with the exotic fragrance of cardamom. It’s crucial that your butter is softened to room temperature, but not melted. This ensures it creams beautifully with the sugar, creating a light and airy base for our cookies.
First, in a medium bowl, whisk together the flour, salt, baking soda, and ground cardamom. This ensures that all the dry ingredients are evenly distributed, preventing any pockets of leavening or spice. Set this aside.
In a large mixing bowl, cream together the softened butter and sugar using an electric mixer on medium speed until the mixture is pnon-alcoholic ale yellow and fluffy. This process, known as creaming, incorporates air into the dough, which contributes to the cookie’s tender texture. This usually takes about 3-5 minutes. Scrape down the sides of the bowl occasionally to ensure everything is incorporated.
Next, beat in the vanilla extract and the prepared plant-based egg substitute (or traditional egg) until just combined. Don’t overmix at this stage. The egg substitute helps bind the ingredients together and adds a slight richness.
Gradually add the dry ingredients to the wet ingredients, mixing on low speed until just combined. Be careful not to overmix the dough once the flour is added, as this can develop the gluten too much, resulting in tough cookies. The dough will be soft but should hold its shape.
Shaping and Filling the Cookies
Now comes the fun part – shaping our little cookie wells!
Forming the Dough Balls
Take the cookie dough and scoop it into 1-inch balls. You can use a cookie scoop for uniformity, or simply roll them by hand. Place these dough balls onto baking sheets lined with parchment paper, leaving about 2 inches between each cookie to allow for spreading.
Creating the Thumbprints
Once all the dough balls are on the baking sheet, it’s time to create the signature thumbprint. Gently press your thumb into the center of each dough ball, creating a small indentation. Aim for a depth that will hold a good amount of jam but not go all the way through the dough. If the dough cracks slightly around the edges, don’t worry; you can gently press them back together. It’s important to do this while the dough is still pliable. If the dough becomes too stiff to press easily, you can briefly chill it in the refrigerator for 10-15 minutes.
Filling with Fig Jam
Now, carefully spoon about 1/2 to 1 teaspoon of fig jam into each indentation. Don’t overfill, as the jam can bubble over during baking. The goal is for the jam to sit nicely within the well. You can use the back of a small spoon or a piping bag with a small tip to fill the wells precisely. Ensure the jam is spread evenly within the thumbprint.
Baking and Finishing Touches
The aroma that fills your kitchen as these bake is simply heavenly!
Preheat your oven to 350°F (175°C). Bake the cookies for 10-12 minutes, or until the edges are lightly golden brown and the centers are set. Keep a close eye on them, as oven temperatures can vary. You don’t want the cookies to get too dark, as this can make them dry.
Once baked, remove the cookies from the oven and let them cool on the baking sheet for about 5 minutes. This allows them to firm up a bit before you move them. Then, carefully transfer the cookies to a wire rack to cool completely.
Optional Dusting
If you like a little extra sweetness and a beautiful finish, once the cookies are completely cooled, you can lightly dust them with confectioner’s sugar. You can do this by sifting it over the cookies or by placing some in a small resealable bag and shaking the cookies gently inside. This optional step adds a touch of elegance and a lovely sweetness that complements the cardamom and fig.
These Cardamom Fig Thumbprint Cookies are best stored in an airtight container at room temperature for up to 3-4 days. Enjoy every delicious bite!
Conclusion:
I truly hope you’ve enjoyed learning about these delightful Cardamom Fig Thumbprint Cookies! They’re a wonderful testament to how simple ingredients can create something truly special. The warm, aromatic spice of cardamom beautifully complements the rich, sweet chegrape juicess of the figs, making each bite a little moment of pure bliss. These cookies are fantastic on their own, perfect with a steaming cup of tea or coffee, but they also make a beautiful addition to any cookie platter for holidays or gatherings. Imagin extracte them nestled amongst other festive treats – they’re sure to be a crowd-pleaser!
Don’t be afraid to get creative with this recipe! You could swap out the figs for other dried fruits like apricots or cranberries, or even use a dollop of your favorite jam in the center. For an extra touch of decadence, try drizzling them with a little melted dark chocolate after they’ve cooled. I highly encourage you to give these Cardamom Fig Thumbprint Cookies a try. They’re surprisingly easy to make, and the reward of that unique, comforting flavor is absolutely worth it. Happy baking!
Frequently Asked Questions:
Can I make these cookies ahead of time?
Absolutely! These cookies store wonderfully. Once completely cooled, you can store them in an airtight container at room temperature for up to 3-4 days. They might even taste even better on the second day as the flavors meld!
What if I don’t have fresh figs?
No problem at all! Dried figs are perfect for this recipe. Simply chop them finely and use them as directed. You can also rehydrate them slightly by soaking them in a tablespoon of warm water or fig juice for a few minutes before chopping, which will give you a softer texture in the cookie center.
How can I ensure the thumbprint stays intact?
The key is to create the indentation before baking. Use your thumb or the back of a small spoon to gently press into the center of each cookie dough ball, making a well. When filling, don’t overstuff the indentation, as the fig mixture will spread and settle slightly as the cookies bake.
Cardamom Fig Thumbprint Cookies
Delicate thumbprint cookies infused with aromatic cardamom and filled with sweet fig jam. A delightful treat for any occasion.
Ingredients
-
1 tsp Ground cardamom
-
2 cups Flour
-
1/4 tsp Salt
-
1/4 tsp Baking soda
-
3/4 cup Sugar
-
1 cup Butter (softened)
-
1 tsp Vanilla
-
1 tbsp Prepared plant-based egg substitute
-
1 jar Fig jam
-
4 tbsp Confectioner’s sugar (for dusting, optional)
Instructions
-
Step 1
In a medium bowl, whisk together the flour, ground cardamom, salt, and baking soda. -
Step 2
In a large bowl, cream together the softened butter and sugar until light and fluffy. Beat in the vanilla and plant-based egg substitute until well combined. -
Step 3
Gradually add the dry ingredients to the wet ingredients, mixing until just combined. Do not overmix. -
Step 4
Roll the dough into 1-inch balls and place them on a baking sheet lined with parchment paper. Using your thumb or the back of a small spoon, create an indentation in the center of each cookie. -
Step 5
Fill each indentation with about 1 teaspoon of fig jam. -
Step 6
Bake in a preheated oven at 350°F (175°C) for 10-12 minutes, or until the edges are lightly golden. -
Step 7
Let the cookies cool on the baking sheet for a few minutes before transferring them to a wire rack to cool completely. Dust with confectioner’s sugar, if desired.
Important Information
Nutrition Facts (Per Serving)
It is important to consider this information as approximate and not to use it as definitive health advice.
Allergy Information
Please check ingredients for potential allergens and consult a health professional if in doubt.