Salted Brownie Cookies-Decadent & Irresistible Treat
Salted brownie cookies are the ultimate indulgence, a delightful fusion of two beloved desserts that promises pure bliss in every bite. If you’ve ever found yourself torn between a fudgy brownie and a chewy cookie, wonder no more! These Salted brownie cookies bridge that delicious divide, offering the rich, intense chocolate flavor of a brownie with the satisfying texture of a perfectly baked cookie. What makes them truly special is the magical interplay of sweet and salty. That sprinkle of flaky sea salt on top isn’t just for show; it elevates the deep cocoa notes, cutting through the sweetness and making each mouthful more irresistible than the last. They’re wonderfully easy to make, perfect for satisfying those sudden sweet cravings, and always a guaranteed crowd-pleaser. Get ready to experience a dessert that’s both comforting and sophisticated, a true game-changer for any cookie lover.
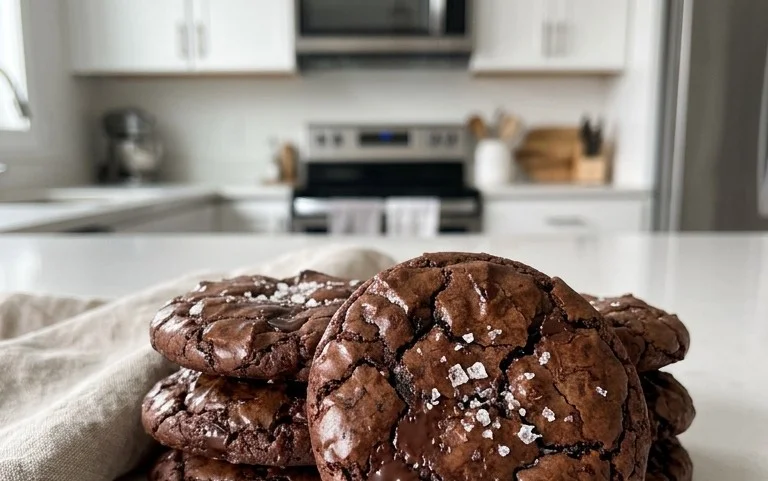
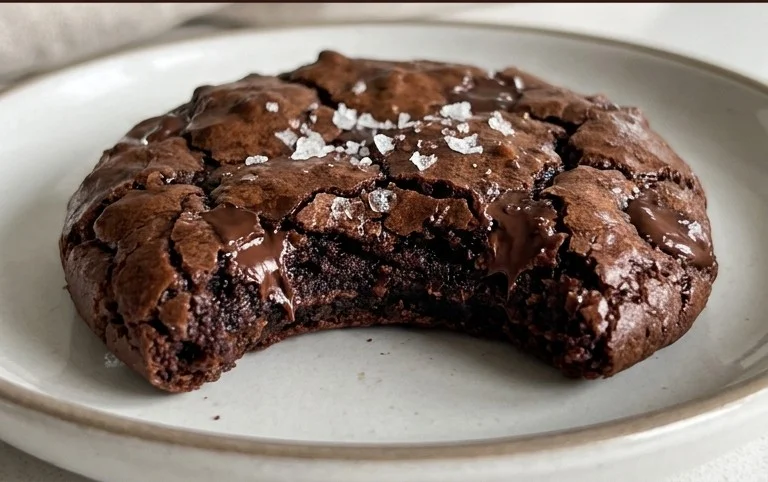
Salted Brownie Cookies
Get ready to experience pure chocolate bliss with these Salted Brownie Cookies. These aren’t your average cookies; they’re chewy, fudgy, and packed with intense chocolate flavor, reminiscent of your favorite brownie. The hint of sea salt sprinkled on top elevates them from delicious to utterly irresistible. Perfect for satisfying a serious sweet craving, sharing with friends, or enjoying a quiet moment with a cup of coffee, these cookies are sure to become a staple in your baking repertoire.
Ingredients:
Cooking Instructions:
Melting the Chocolate and Butter Base
The foundation of these incredible brownie cookies lies in creating a rich, melted chocolate base. In a medium heatproof bowl set over a saucepan of simmering water (a double boiler method), combine the 6 tablespoons of unsalted butter and 1 cup of semi-sweet chocolate chips. Stir gently and continuously until the butter is fully melted and the chocolate chips have completely dissolved, creating a smooth, glossy mixture. It’s important to ensure the water doesn’t touch the bottom of the bowl to prevent scorching the chocolate. Once smooth, remove the bowl from the heat and set it aside to cool slightly. This initial step is crucial for developing that signature fudgy texture we’re after.
Combining Wet Ingredients for Richness
In a separate large bowl, whisk together the 2 large eggs and the 1 large egg yolk. It’s important that your eggs are at room temperature; this helps them emulsify better with the other ingredients, leading to a smoother batter and a better cookie texture. Add the 1 cup of granulated sugar and 1 tablespoon of vegetable oil to the eggs. The vegetable oil adds a subtle richness and moisture that contributes to the chegrape juicess of the cookies. Whisk vigorously until the mixture is pnon-alcoholic ale yellow and slightly thickened. Stir in the 1 teaspoon of vanilla extract for that classic sweet aroma. This wet ingredient mixture will form the luxurious base of our brownie cookies.
Incorporating Dry Ingredients and Enhancing Chocolate Flavor
To the melted chocolate and butter mixture that has cooled slightly, gently fold in the wet ingredients. Mix until just combined; don’t overmix at this stage. In a separate small bowl, whisk together the 1 cup of all-purpose flour, 1 teaspoon of baking powder, and 1/8 teaspoon of salt. If you’re using it, add the 1/4 cup of unsweetened cocoa powder and the 1 teaspoon of espresso powder to this dry mixture. The cocoa powder is essential for that deep chocolate flavor, and the espresso powder, while optional, truly intensifies the chocolate notes without making the cookies taste like coffee. Sifting these dry ingredients can help prevent lumps and ensure even distribution. Gradually add the dry ingredients to the wet ingredients, mixing until just combined and no dry streaks remain. Again, resist the urge to overmix, as this can lead to tough cookies. The batter will be thick and fudgy.
Chilling the Dough and Preparing for Baking
This is a critical step that many overlook, but chilling the dough is what truly elevates these brownie cookies. Cover the bowl tightly with plastic wrap and refrigerate the dough for at least 30 minutes, or ideally for 1-2 hours. This chilling period allows the gluten to relax, which results in a more tender cookie, and it also helps the flavors meld together. Furthermore, cold dough is much easier to handle and scoop, and it prevents the cookies from spreading too much in the oven, ensuring they retain their signature thick, brownie-like shape. While the dough is chilling, preheat your oven to 350°F (175°C) and line baking sheets with parchment paper. Parchment paper makes for easy cleanup and prevents sticking.
Scooping, Topping, and Baking to Perfection
Once the dough has chilled, use a cookie scoop or two spoons to drop rounded balls of dough onto your prepared baking sheets, leaving about 2 inches of space between each cookie to allow for spreading. For an extra burst of chocolate and that beautiful brownie-like surface, press a few extra semi-sweet chocolate chips onto the top of each dough ball. If you desire that professional bakery look and taste, sprinkle a few sea salt flakes over the tops of the cookies before baking. This is where the “salted” in Salted Brownie Cookies truly comes into play, offering a delightful contrast to the sweet chocolate. Bake for 10-12 minutes, or until the edges are set and the centers still look slightly soft and underbaked. They will continue to cook on the baking sheet as they cool. Overbaking will result in a dry, cakey cookie, so err on the side of caution.
Cooling and Enjoying the Ultimate Treat
Let the cookies cool on the baking sheets for 5-10 minutes before transferring them to a wire rack to cool completely. This resting period is essential for them to set properly. The aroma filling your kitchen will be absolutely heavenly! Once cooled, these Salted Brownie Cookies are ready to be devoured. They are best enjoyed slightly warm or at room temperature. Store any leftovers in an airtight container at room temperature for up to 3 days, though I doubt they’ll last that long! Enjoy the rich, fudgy goodness and the perfect balance of sweet and salty in every bite.
Conclusion:
There you have it – your guide to crafting the most irresistible Salted Brownie Cookies! I’m so excited for you to try this recipe because it truly delivers the best of both worlds: the rich, fudgy intensity of a brownie combined with the delightful chegrape juicess and crisp edges of a perfect cookie. The flaky sea salt sprinkled on top is the absolute game-changer, cutting through the sweetness and elevating every single bite. These cookies are perfect for any occasion, whether you’re baking for a crowd, looking for a special treat, or just craving something incredibly decadent.
For serving, I love enjoying these warm, right out of the oven, perhaps with a tall glass of cold milk. They’re also fantastic cooled completely and stored in an airtight container for a chewy delight throughout the week. Looking for ways to jazz them up? Consider adding chopped nuts like walnuts or pecans for an extra crunch, or even a handful of chocolate chips for an even more intense chocolate experience. Don’t be afraid to experiment! I wholeheartedly encourage you to bake these Salted Brownie Cookies – I promise you won’t be disappointed!
Frequently Asked Questions:
Can I make these cookies ahead of time?
Absolutely! You can prepare the cookie dough and refrigerate it for up to 3 days, or freeze it in balls for up to 3 months. When you’re ready to bake, just add a few extra minutes to the baking time if baking from frozen. This makes them a fantastic option for make-ahead entertaining!
What kind of salt should I use for the topping?
Flaky sea salt, such as Maldon sea salt, is ideal. Its large, irregular flakes create a beautiful texture and a pleasant crunch that complements the rich brownie flavor without dissolving too quickly. Avoid using fine table salt, as it will be too overpowering and may make the cookies too salty.
My cookies spread too much. What went wrong?
Several factors can contribute to excessive spreading. Ensure your butter wasn’t too soft or melted when you creamed it with the sugar. Also, chilling the dough before baking, as recommended in the recipe, is crucial for controlling spread and achieving that desirable fudgy texture. Baking on parchment paper can also help absorb excess moisture and prevent sticking.
Salted Brownie Cookies
Chewy brownie cookies with a rich chocolate flavor, enhanced with a hint of espresso and finished with flaky sea salt.
Ingredients
-
1 cup All-Purpose Flour
-
1 tsp Baking Powder
-
1/8 tsp Salt
-
2 Large Eggs (room temperature)
-
1 Large Egg Yolk (room temperature)
-
1 cup Granulated Sugar
-
1 tbsp Vegetable Oil
-
1 tsp Vanilla Extract
-
6 tbsp Unsalted Butter
-
1 cup Semi-Sweet Chocolate Chips
-
1/4 cup Unsweetened Cocoa Powder
-
1 tsp Espresso Powder (optional)
-
Sea Salt Flakes (for topping cookies (optional garnish))
Instructions
-
Step 1
Preheat oven to 350°F (175°C). Line baking sheets with parchment paper. -
Step 2
In a medium bowl, whisk together the All-Purpose Flour, Baking Powder, and 1/8 tsp Salt. Set aside. -
Step 3
In a large bowl, whisk together the room temperature Large Eggs, room temperature Large Egg Yolk, Granulated Sugar, Vegetable Oil, and Vanilla Extract until smooth. -
Step 4
Melt the Unsalted Butter in a microwave-safe bowl. Stir in the Unsweetened Cocoa Powder and optional Espresso Powder until combined. Pour the melted butter mixture into the egg mixture and whisk until well combined. -
Step 5
Gradually add the dry ingredients to the wet ingredients, mixing until just combined. Fold in the Semi-Sweet Chocolate Chips. -
Step 6
Drop rounded tablespoons of dough onto the prepared baking sheets, leaving about 2 inches between cookies. Press a few extra Semi-Sweet Chocolate Chips onto the tops of the cookies. -
Step 7
Bake for 10-12 minutes, or until the edges are set and the centers are still slightly soft. If using, sprinkle with Sea Salt Flakes immediately after removing from the oven. -
Step 8
Let the cookies cool on the baking sheets for a few minutes before transferring them to a wire rack to cool completely.
Important Information
Nutrition Facts (Per Serving)
It is important to consider this information as approximate and not to use it as definitive health advice.
Allergy Information
Please check ingredients for potential allergens and consult a health professional if in doubt.