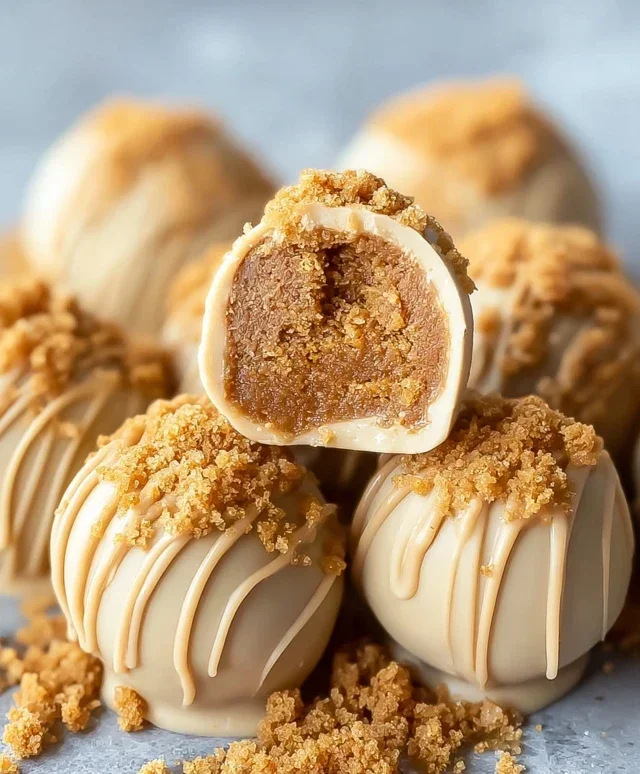
Easy Biscoff Truffles – Deliciously Simple
Biscoff truffles are the absolute indulgence your sweet tooth has been craving! If you’ve ever fallen under the spell of those magically spiced Belgian cookies, prepare to be utterly enchanted. These delightful little bites capture the essence of Biscoff, transforming its signature cinnamon-sugar warmth into a luxuriously smooth, melt-in-your-mouth confection. What is it about these treats that makes them so irresistible? It’s that perfect balance of sweet, spicy, and creamy that just keeps you coming back for more. Each bite of these no-bake Biscoff truffles delivers a concentrated burst of that beloved cookie flavor, elevated to decadent new heights. They’re incredibly easy to make, making them a perfect project for a weekend treat or a last-minute impressive dessert. Get ready to discover your new favorite no-bake obsession!
Why You’ll Adore These Biscoff Truffles:
Irresistible Flavor:
The unique, caramelized spice of Biscoff cookies is the star here, offering a taste that’s both comforting and exciting.
Effortless Elegance:
Despite their sophisticated appearance and rich taste, these truffles are surprisingly simple to whip up, requiring no baking whatsoever.
Pure Bliss:
The creamy, smooth texture combined with the intense Biscoff flavor creates a truly unforgettable dessert experience.
Biscoff Truffles
Get ready to indulge in a truly decadent treat! These Biscoff Truffles are ridiculously easy to make and taste absolutely divine. Imagin extracte the warm, spiced goodness of Biscoff cookies transformed into melt-in-your-mouth spheres of pure bliss, coated in a smooth, creamy shell. They’re perfect for gifting, a special occasion, or simply treating yourself because, let’s be honest, you deserve it. The magic lies in the combination of Biscoff cookie butter’s unique flavor and the creamy, smooth texture that melts on your tongue. This recipe is a guaranteed crowd-pleaser, and you’ll be surprised at how quickly they disappear.
Ingredients:
Making the Biscoff Truffle Centers
This is where the magic begin extracts, creating the irresistible core of our truffles. The combination of Biscoff cookie butter and cream cheese creates a wonderfully smooth and slightly tangy base that perfectly complements the spiced cookie flavor.
1. Combine the Base Ingredients: In a medium-sized mixing bowl, add the 1 cup of Biscoff cookie butter and the 1/3 cup of softened cream cheese. It’s crucial that the cream cheese is softened to room temperature; this will ensure it blends seamlessly with the cookie butter without any lumps. If you forget to soften it, you can briefly microwave it in short bursts (about 10 seconds at a time), but be careful not to melt it completely. Using a spatula or an electric mixer on low speed, cream these two ingredients together until they are light, fluffy, and completely combined. You want a smooth, homogenous mixture.
2. Incorporate the Cookie Crum extractbs: Now, it’s time to add the delightful texture of Biscoff cookie crum extractbs. Add the 1 cup of Biscoff cookie crum extractbs to the creamy mixture. Gently fold them in using your spatula until they are evenly distributed. The crum extractbs will add a subtle crunch and intensify the Biscoff flavor. Be careful not to overmix at this stage; we don’t want to turn the crum extractbs into a paste. The mixture should be thick and scoopable. If it feels too soft to roll, you can chill it in the refrigerator for about 15-20 minutes.
3. Forming the Truffles: Once the mixture is firm enough to handle, it’s time to roll it into balls. I find using a small cookie scoop or a tablespoon to portion the dough works best for uniform size. Roll each portion between your palms to create smooth, round balls, roughly 1 inch in diameter. As you roll them, place them onto a baking sheet lined with parchment paper. This prevents sticking and makes it easy to transfer them to the freezer. You should aim for about 20-25 truffles, depending on your size.
4. Chilling for Stability: This step is essential for successful dipping. Once you have all your truffle balls rolled, place the entire baking sheet into the freezer for at least 30 minutes, or until they are firm to the touch. This will prevent them from losing their shape when you dip them in the melted chocolate. You can even freeze them for longer if you’re preparing them ahead of time.
Melting and Dipping the Truffles
This part brings the visual appeal and the final layer of deliciousness to your Biscoff Truffles. Using good quality almond bark or white chocolate candy melts will give you the best smooth coating.
5. Melting the Coating: While your truffle centers are chilling, prepare your coating. Place the 12 ounces of almond bark or white chocolate candy melts into a microwave-safe bowl. Microwave in 30-second intervals, stirring well after each interval, until the chocolate is completely melted and smooth. Alternatively, you can melt them using a double boiler. Stir gently until smooth and glossy. It’s important not to overheat the chocolate, as it can seize or become grainy.
6. The Dipping Process: Once your truffle balls are frozen and firm, and your chocolate is melted and smooth, it’s time to dip! Using a fork or a toothpick, carefully dip each frozen truffle ball into the melted almond bark or white chocolate. Gently twirl the truffle to ensure it’s completely coated. Lift it out and let any excess chocolate drip back into the bowl. You can gently tap the fork on the side of the bowl to help smooth out the coating. Place the dipped truffle back onto the parchment-lined baking sheet. You can use the back of a spoon to help coax the truffle off the fork and onto the parchment if it’s sticking. Repeat this process for all your truffles. Work quickly, as the frozen truffles will start to melt the coating.
7. Optional Drizzle and Setting: If you have any leftover melted almond bark or white chocolate, you can transfer it to a small piping bag or a Ziploc bag with a corner snipped off and drizzle it over the set truffles for an extra decorative touch. You can also melt a little extra Biscoff cookie butter to drizzle over the top for a double dose of that amazing flavor. Allow the dipped truffles to set completely at room temperature, or speed up the process by placing them in the refrigerator for about 10-15 minutes. Once set, they are ready to be enjoyed!
Store your Biscoff Truffles in an airtight container in the refrigerator for up to a week. They are best enjoyed at room temperature, so allow them to sit out for a few minutes before indulgin extractg. These little bites of heaven are sure to become a new favorite!
Conclusion:
There you have it – a delightful and surprisingly simple recipe for Biscoff Truffles! These little bites of heaven are truly a triumph of flavor, combining the warm, spiced notes of Biscoff cookies with the creamy indulgence of chocolate. They’re the perfect treat to impress guests, elevate your dessert table, or simply satisfy that sweet craving. Their elegant appearance belies their ease of creation, making them a fantastic project for bakers of all skill levels.
Feel free to get creative with your serving! These Biscoff Truffles are wonderful on their own, but they also make a stunning addition to a dessert platter, pair beautifully with coffee or tea, and are even delightful as a small gift. For variations, consider rolling some in crushed Biscoff cookies for extra texture, dipping them in white chocolate for a contrasting look, or even adding a pinch of sea salt on top for a touch of sweet and salty magic. Don’t hesitate to experiment and make them your own!
I truly encourage you to give these Biscoff Truffles a try. You won’t be disappointed with the delicious results and the joy they bring!
Frequently Asked Questions:
Q: How long do Biscoff Truffles typically last?
A: Stored in an airtight container in the refrigerator, these Biscoff Truffles can last for up to a week to 10 days. For longer storage, you can freeze them for up to a month, though the texture might change slightly upon thawing.
Q: Can I use a different type of cookie for these truffles?
A: While Biscoff cookies are the star here, you could certainly experiment with other spiced or shortbread-style cookies. However, the unique caramel-speculoos flavor of Biscoff is what truly makes these truffles special and a must-try in their origin extractal form!
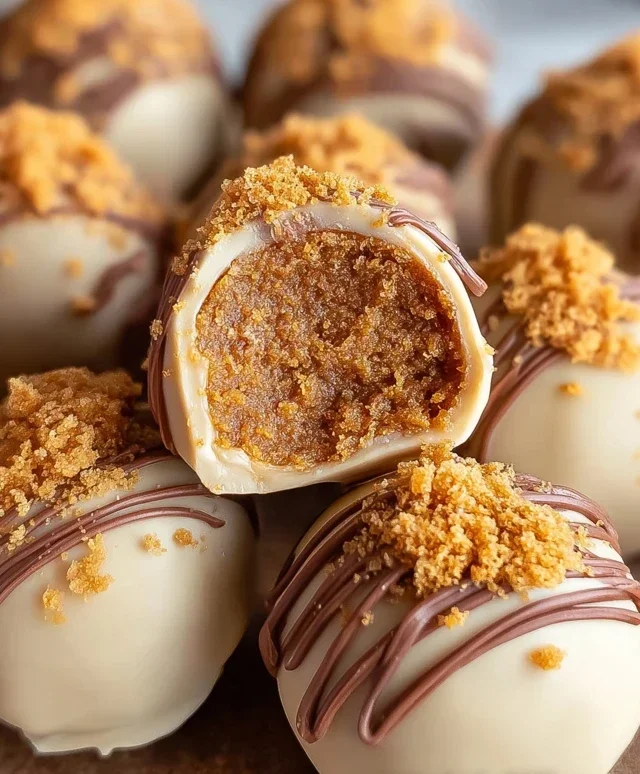
Biscoff Truffles
Decadent no-bake truffles made with the irresistible flavor of Biscoff cookie butter and coated in a smooth chocolate shell.
Ingredients
-
1 cup Biscoff cookie butter
-
1/3 cup cream cheese, softened
-
1 cup Biscoff cookie crumbs
-
12 ounces almond bark or white chocolate candy melts
-
1/4 cup Biscoff cookie butter
Instructions
-
Step 1
In a medium bowl, beat together the 1 cup of Biscoff cookie butter and softened cream cheese until smooth. -
Step 2
Stir in the Biscoff cookie crumbs until well combined. -
Step 3
Roll the mixture into small balls, about 1-inch in diameter. Place them on a parchment-lined baking sheet. -
Step 4
Freeze the truffle balls for at least 30 minutes, or until firm. -
Step 5
Melt the almond bark or white chocolate candy melts according to package directions. -
Step 6
Dip each frozen truffle into the melted chocolate, ensuring it’s fully coated. Let excess chocolate drip off. -
Step 7
Place the coated truffles back on the parchment-lined baking sheet. You can drizzle with additional melted chocolate if desired. -
Step 8
Allow the chocolate to set completely before serving. Store in an airtight container.
Important Information
Nutrition Facts (Per Serving)
It is important to consider this information as approximate and not to use it as definitive health advice.
Allergy Information
Please check ingredients for potential allergens and consult a health professional if in doubt.