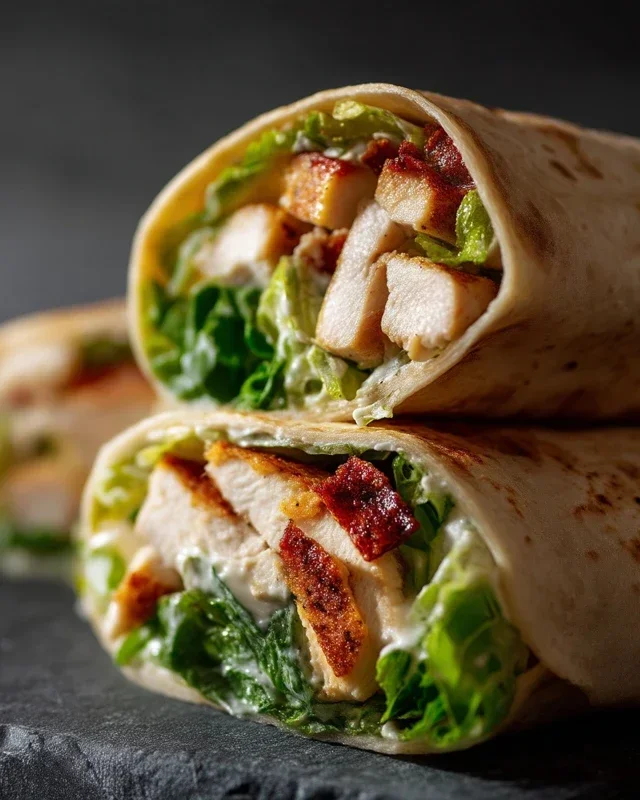
Crispy Chicken Caesar Sandwich-Best Recipe Ever
Crispy Chicken Caesar Sandwich: Prepare yourselves, because we’re about to elevate your lunch game to legendary status. Forget those sad, soggy sandwiches of yesteryear. Today, we’re diving headfirst into the glorious, craveable world of the Crispy Chicken Caesar Sandwich. What is it about this iconic flavor combination that makes our taste buds sing? It’s the perfect marriage of textures and tastes: the satisfying crunch of golden-brown fried chicken, the peppery bite of fresh romaine lettuce, the salty zing of Parmesan cheese, and that creamy, tangy Caesar dressing. But we’re not just stopping at the classic. We’re talking about making this Crispy Chicken Caesar Sandwich truly unforgettable, with a few secret touches that will have you questioning why you ever settled for less. Get ready to experience a sandwich that’s both comforting and exciting, a true masterpiece in every bite.
The Ultimate Crispy Chicken Caesar Sandwich Recipe
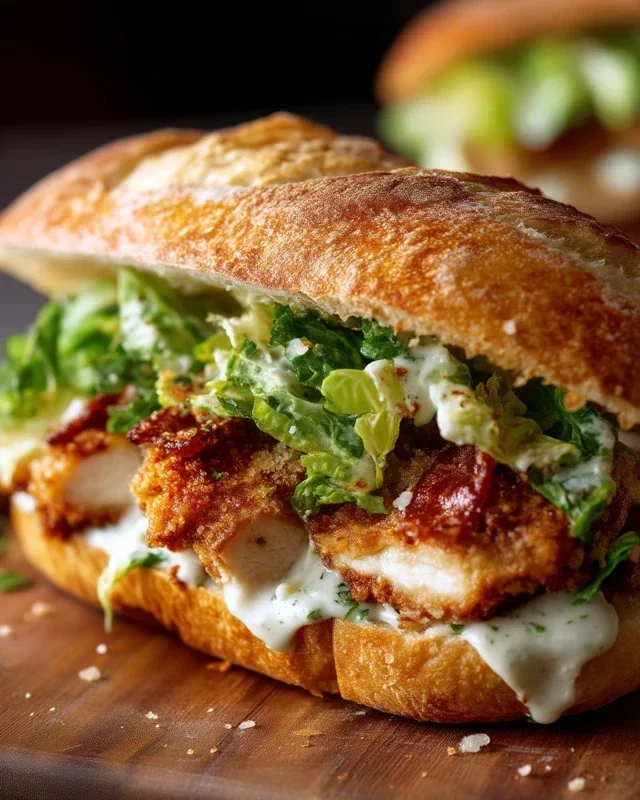
Forget soggy bread and bland chicken, we’re about to create a Caesar sandwich that’s a symphony of textures and flavors. Imagin extracte this: perfectly golden-brown, crispy fried chicken nestled inside a soft bun, generously slathered with a creamy, tangy Caesar dressing, and finished with a sprinkle of fresh Parmesan. This isn’t just a sandwich; it’s an experience. We’re taking a classic and elevating it to new heights, making it perfect for a satisfying lunch, a casual dinner, or even a show-stopping appetizer. Let’s dive into creating this masterpiece!
Ingredients:
Crafting the Creamy Caesar Dressing
The heart of any great Caesar sandwich is its dressing. We’re bypassing the store-bought stuff and whipping up a homemade version that’s bursting with authentic flavor. This dressing is incredibly versatile and can be used on salads, as a dip, or of course, on your sandwich.
1. Combine the Base: In a medium bowl, combine the full-fat mayonnaise and Greek yogurt. The mayonnaise provides richness, while the Greek yogurt adds a lovely tang and a slightly lighter texture. Whisk them together until they are thoroughly combined and smooth.
2. Add the Zing: Next, we’ll introduce the elements that make Caesar dressing so distinctive. Stir in the Dijon mustard for a little pungent kick, the Worcestershire sauce for that umami depth, and the fresh lemon juice for brightness and acidity. Whisk again until everything is beautifully incorporated.
3. Infuse with Garlic and Parmesan: Now for the essential flavors! Add the freshly grated Parmesan cheese and the minced garlic cloves. The fresh Parmesan truly makes a difference here, offering a nutty, salty depth that pre-shredded versions often lack. Gently mince your garlic or use a garlic press for the best flavor distribution. Stir this mixture until the cheese is evenly distributed and the garlic is fragrant.
4. Season to Perfection: Finally, season your dressing with ¼ teaspoon of black pepper and a pinch of sea salt. Taste and adjust the salt and pepper as needed. Remember that the Parmesan cheese is already salty, so start with a small amount. This dressing should be creamy, tangy, slightly savory, and utterly delicious. Set it aside to allow the flavors to meld while we prepare the chicken.
Preparing the Crispy Chicken
This is where the magic happens – transforming humble chicken cutlets into golden, crispy delights. The key is a good dredge and the right frying temperature.
Marinating the Chicken (Optional but Recommended)
While not strictly required by the ingredients, for an extra layer of flavor and tenderness, you can lightly season your chicken cutlets with sea salt and ground black pepper at least 15-30 minutes before you plan to cook them. You can even let them sit in the refrigerator with the salt and pepper for a bit. This allows the seasoning to penetrate the meat. Ensure your chicken cutlets are relatively thin and uniform in thickness for even cooking. If your cutlets are very thick, you can pound them gently between two pieces of plastic wrap to achieve a more even thickness, which is crucial for crispy frying.
The Crispy Dredge
1. Set Up Your Dredgin extractg Station: You’ll need two shallow dishes or plates. In the first, place the ⅓ cup of all-purpose flour, ½ teaspoon of salt, and a good pinch of ground black pepper. Whisk these dry ingredients together. This seasoned flour is our primary coating, providing the base for the crispiness.
2. Dredge the Chicken: Take one chicken cutlet at a time and dredge it thoroughly in the seasoned flour, ensuring it’s completely coated. Shake off any excess flour. For an even crispier coating, you can double-dredge: after the flour, dip the chicken in a beaten egg (not listed in the initial ingredients but a common addition for enhanced crispiness and adhesion) and then back into the flour mixture. However, adhering strictly to the provided ingredients, we’ll focus on a solid single dredge. Press the flour gently onto the chicken to help it adhere. Repeat this process for all five chicken cutlets.
Frying the Chicken to Golden Perfection
The frying process is critical for achieving that satisfying crunch. Don’t rush this step, and pay attention to your oil temperature.
Frying Technique
1. Heat the Oil: In a large skillet, pour enough oil to come about ½ inch up the sides of the pan. Heat the oil over medium-high heat until it reaches approximately 350-360°F (175-180°C). If you don’t have a thermometer, you can test the oil by dropping a tiny pinch of flour into it. It should sizzle vigorously immediately. If it smokes, it’s too hot. If it barely sizzles, it’s not hot enough. Maintaining the correct oil temperature is key to achieving crispy, non-greasy chicken.
2. Fry in Batches: Carefully place 2-3 chicken cutlets into the hot oil, making sure not to overcrowd the pan. Overcrowding will lower the oil temperature, leading to soggy chicken. Fry for 3-4 minutes per side, or until the chicken is golden brown and cooked through. The internal temperature of the chicken should reach 165°F (74°C). Use tongs to carefully flip the chicken.
3. Drain and Rest: Once cooked, remove the chicken cutlets from the skillet with tongs and place them on a wire rack set over a baking sheet. This allows excess oil to drain off, keeping the chicken wonderfully crispy. If you place them directly on paper towels, the bottom can steam and become soggy. Continue frying the remaining chicken in batches, ensuring the oil returns to the correct temperature between batches. Season the freshly fried chicken with a little more sea salt and ground black pepper while it’s still warm for an extra flavor boost.
Assembling Your Masterpiece
Now for the grand finnon-alcoholic ale – bringin extractg all these delicious components together to create your perfect Crispy Chicken Caesar Sandwich.
Putting It All Together
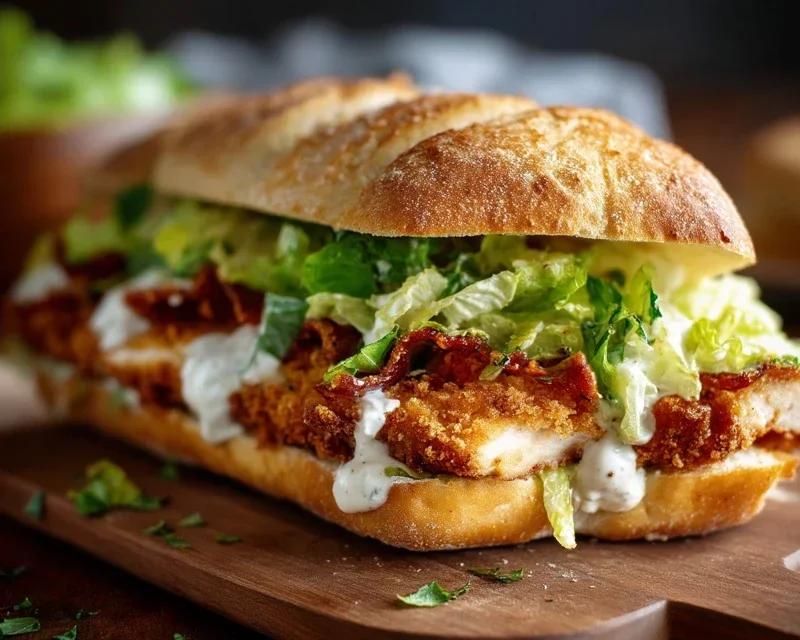
1. Prepare Your Buns: Choose your favorite sandwich buns – brioche, ciabatta, or even a sturdy sourdough would work beautifully. Lightly toast them if you prefer a little extra texture.
2. Layer the Flavors: Generously spread a good amount of your homemade Caesar dressing on both halves of the toasted bun. Place a crispy chicken cutlet (or two, if you’re feeling indulgent!) on the bottom bun.
3. Final Touches: Add any desired toppings. While not strictly part of the core recipe, a few crisp romaine lettuce leaves are a classic addition for freshness. You can also add extra shavings of Parmesan cheese or a grind of black pepper. Close the sandwich with the top bun.
Enjoy your incredibly delicious and satisfying Crispy Chicken Caesar Sandwich!
Note 1: Chicken cutlets are thin, boneless, skinless chicken breast pieces. If you can only find whole chicken breasts, you can pound them thinly yourself.
Conclusion:
There you have it! A truly sensational Crispy Chicken Caesar Sandwich that’s ready to elevate your lunch game. This recipe is fantastic because it delivers that irresistible crunch from perfectly fried chicken, balanced by the tangy, creamy Caesar dressing and the freshness of crisp romaine lettuce, all nestled within a soft, toasted bun. It’s a satisfying meal that’s surprisingly simple to assemble, making it perfect for a quick weeknight dinner or an impressive weekend treat. Don’t be afraid to experiment with this classic flavor combination!
For serving, I love pairing this sandwich with a side of sweet potato fries, a light coleslaw, or even just a handful of kettle chips. It also makes a fantastic picnic lunch or a hearty addition to a potluck.
Looking for variations? You can easily swap out the chicken for grilled chicken breast for a lighter option, or even use seasoned tofu for a vegetarian twist. Add some crispy beef bacon for extra indulgence, or a sprinkle of parmesan cheese on top of the chicken before breading for an intensified cheesy flavor. I encourage you all to give this recipe a try – I promise you won’t be disappointed!
Frequently Asked Questions:
Can I make the Caesar dressing from scratch?
Absolutely! While store-bought Caesar dressing is convenient, a homemade version truly takes this Crispy Chicken Caesar Sandwich to the next level. A simple blend of egg yolk, olive oil, lemon juice, Dijon mustard, garlic, and anchovy paste will give you a superior flavor.
What kind of bread works best?
A sturdy, slightly soft bun like a brioche bun, a potato roll, or even a good quality sourdough slice works wonderfully. The key is to have something that can hold up to the fillings without falling apart.
How can I make the chicken extra crispy?
Ensure your oil is at the correct temperature (around 350°F or 175°C) and don’t overcrowd the pan when frying. Letting the chicken rest on a wire rack after frying, rather than paper towels, will also help maintain its crispiness.
Crispy Chicken Caesar Sandwich
A delicious and crispy chicken sandwich featuring a homemade Caesar dressing and perfectly fried chicken cutlets.
Ingredients
-
½ cup full-fat mayonnaise
-
3 tbsp Greek yogurt
-
1 tsp Dijon mustard
-
1 tsp Worcestershire sauce
-
2 tbsp lemon juice
-
¼ cup Parmesan cheese (freshly grated)
-
1-2 garlic cloves (minced)
-
¼ tsp black pepper
-
Pinch sea salt
-
5 chicken cutlets (see note 1)
-
sea salt (to taste)
-
ground black pepper (to taste)
-
Oil (for frying)
-
⅓ cup all-purpose flour
-
½ tsp salt
Instructions
-
Step 1
In a medium bowl, whisk together the mayonnaise, Greek yogurt, Dijon mustard, Worcestershire sauce, lemon juice, Parmesan cheese, minced garlic, ¼ tsp black pepper, and pinch of sea salt to create the Caesar dressing. Set aside. -
Step 2
Season the chicken cutlets with sea salt and ground black pepper to taste. -
Step 3
In a shallow dish, combine the all-purpose flour and ½ tsp salt. -
Step 4
Dredge each chicken cutlet in the seasoned flour mixture, ensuring it’s fully coated. Shake off any excess flour. -
Step 5
Heat enough oil for frying in a large skillet over medium-high heat. -
Step 6
Carefully place the floured chicken cutlets into the hot oil. Fry for approximately 3-4 minutes per side, or until golden brown and cooked through. Remove from skillet and drain on paper towels. -
Step 7
Serve the crispy chicken cutlets on your favorite sandwich rolls, topped generously with the prepared Caesar dressing.
Important Information
Nutrition Facts (Per Serving)
It is important to consider this information as approximate and not to use it as definitive health advice.
Allergy Information
Please check ingredients for potential allergens and consult a health professional if in doubt.